Sunday, December 19, 2010

White Chocolate Popcorn

White Chocolate Popcorn is just heaven to eat and a fun treat to have on hand for a holiday snack.

You will die when you see how easy this is to make! 

You will need:
popcorn kernels
marshmallows
M&M's 
white chocolate
 Pop about 1/2 cup kernels of popcorn.  Use your amazing popcorn popper that your cousin bought you for your wedding gift.  This Sunbeam appliance will.not.die.  We use this at least 3-4 times weekly for 9 years now and it just keeps popping! 

Dump all the popcorn into a large pan and look for any un popped kernels. 
Sneaky three right here.  

 In a large bowl - mix 1/2 bag of mar mars (as we call them around here) and a 1/2 bag of M&M's
Add popcorn and mix together....
In a microwavable dish, melt 1/2 bag of white chocolate chips or white almond bark.  Stir every 30 seconds until melted.
 I like Nestle...but the almond bark is good also. 
 When chocolate is melted - pour over popcorn mixture, stir well and make sure everything is evenly coated with chocolate.  Put into parchment paper covered cookie sheet to set.   About 15-20 minutes.
Enjoy!
Linking up to Coastal Charm

Friday, December 10, 2010

Candy Cane Puffs

 1 1/2 cups flour
1/4 tsp. salt
1/2 cup butter, softened
1 cup powdered sugar
1 egg
1 tsp vanilla
1/2 tsp. peppermint extract
package white chips
1/2 cup peppermint candies, crushed

Combine flour and salt; set aside.
Blend together butter and sugar; beat in egg and extracts. Mix into flour mixture using low speed. Wrap dough in plastic wrap; refrigerate for one hour.Or more if you are like me and had things to do and forgot about it for two.

Shape dough into walnut-size balls; place on lightly greased baking sheets. Bake at 375 degrees for 10 minutes; cool. 
Melt white chocolate chips in microwave, stirring every 30 seconds.
Dip tops of cooled cookies into melted chocolate. Sprinkle on crushed peppermints; set on wax paper or parchment paper until hardened. Makes about 3 dozen.
 These were SO SO easy to make and they were yummy!!
Linking up to the cookie party at Pleasant Home and the party at No Minimalist Here!

I got this recipe from cute Julie over at A Vintage Chic!

Tuesday, November 16, 2010

Creamy Pesto Chicken and Pasta

I made this tonight for dinner on a whim - it's been cold and windy here all day and something nice and warm sounded so good!
You will need: 

2 tsp butter (I used just a drizzle of olive oil)
4 skinless, bonelkess chicken breasts, cut into cubes (about 2 cups worth
1 can Condensed Cream of Chicken soup
1/2 cup pesto
1/2 cup milk
3 cups pasta, cooked and drained (you can use bow tie pasta, I used penne since I had that on hand)
Fresh Parmesan cheese

Heat butter or oil in large skillet, over medium heat.  Add chicken and cook until well browned, stirring often.

Stir soup, pesto sauce and milk in skillet.  Heat to a low boil.  Reduce heat to low or until chicken is cooked through.  Stir in pasta and cook until mixture is hot.

To serve sprinkle with teaspoon full of fresh Parmesan cheese. 

Wednesday, October 20, 2010

Pineapple Pear Syrup

I had some pears on hand so I decided to try a new recipe yesterday called Pear Honey.
It was a fairly simple recipe for canning (love that!) calling for only three ingredients.
It took me about 20 minutes with the food processor to get everything together and then 3 hours later I was canning and done.

You will need:
8 cups pears, peeled and grated (in food processor)
4 cups sugar
1 can (20 oz) crushed pineapple, undrained.

Mix together in large stockpot and let simmer for several hours.
Mixture will become syrup like and golden colored.
  It looked more like syrup than honey - so I renamed it.  It is very sweet and delicious!!  Perfect for a special breakfast topping over french toast, pancakes or waffles. 

When ready pour into warm pint jars, seal tightly and place them in a water bath canner with boiling water for 20 minutes.  Remove and let cool.  You can have these on your pantry shelf for up to one year if they have sealed properly.
 They most likely won't last that long in your home though - look at that beautiful golden color!
I thought that some of these would make perfect little "Hello Fall!" gifts to friends.
 Add a bit of twine and a tag and it couldn't be cuter!

 Linking Up to Show and Share at JAG

Tuesday, October 5, 2010

Chopped Tomato and Basil Sauce

We still have quite a few tomatoes coming into our garden.  The basil is on its way out so I thought I would take what was left and make my house smell yummy today.
This was about half of the tomatoes we had!

4 medium sized, ripe tomatoes (about 1.5 pounds - I used a lot of smaller Romas from the garden)
1/4 cup olive oil
2-3 medium cloves garlic, minced
1/3 chopped fresh basil
1/2 tsp salt (I used course sea salt for no special reason)
salt and pepper to taste


Remove and discard the cores of the tomatoes and then coarsely chop them and put them in a large saucepan.
Add the olive oil, garlic, basil, salt and salt and pepper to the tomatoes. Stir well.
Cover and set aside a few hours to release the tomato juices and let the flavors combine.
Pour over pasta and enjoy!
This tomato sauce will keep for one week in the refrigerator.
Isn't that just gorgeous!  I wish you could smell it - it's that good! 
Linking up to Show and Share Day at Just a Girl.

Friday, October 1, 2010

Witch Finger Cookies

Witch Finger Cookies

Ingredients

  • 1 cup butter, softened
  • 1 cup confectioners' sugar
  • 1 egg
  • 1 teaspoon almond extract
  • 1 teaspoon vanilla extract
  • 2 2/3 cups all-purpose flour
  • 1 teaspoon baking powder
  • 1 teaspoon salt
  • 3/4 cup whole almonds
  • 1 (.75 ounce) tube red decorating gel

Directions

  1. Combine the butter, sugar, egg, almond extract, and vanilla extract in a mixing bowl. Beat together with an electric mixer; gradually add the flour, baking powder, and salt, continually beating; refrigerate 20 to 30 minutes.
  2. Preheat oven to 325 degrees. Lightly grease baking sheets.
  3. Remove dough from refrigerator in small amounts. Scoop 1 heaping teaspoon at a time onto a piece of waxed paper. Use the waxed paper to roll the dough into a thin finger-shaped cookie. Press one almond into one end of each cookie to give the appearance of a long fingernail. Squeeze cookie near the tip and again near the center of each to give the impression of knuckles. You can also cut into the dough with a sharp knife at the same points to help give a more finger-like appearance. Arrange the shaped cookies on the baking sheets.
  4. Bake in the preheated oven until the cookies are slightly golden in color, 20 to 25 minutes.
  5. Remove the almond from the end of each cookie; squeeze a small amount of red decorating gel into the cavity; replace the almond to cause the gel to ooze out around the tip of the cookie.
 These are so realistic looking they are a little awkward to eat.  Until you taste one - then my boys couldn't stop.  They are yummy but you might have to close your eyes to get over the fact they are SO realistic looking!

I made these for several Halloween parties last year - easy and so much fun to bring!
Linking to Show and Tell Saturday!

Thursday, September 9, 2010

Raspberry Peach Freezer Jam

Raspberry Peach Freezer Jam

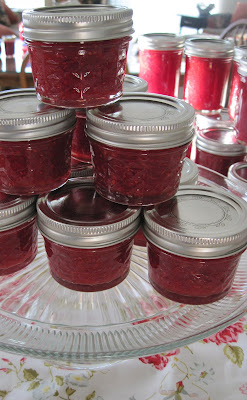
Dan and I made 36 jars of this last night (some are those tiny, cute jars for gift giving) and oh my goodness I think this recipe makes the most beautiful colored jam I have ever seen in my life!

Gorgeous!  
We just followed the recipe in the SureJell box using the instant pectin (it's a silver and blue box you can pick up at Wal-Mart)

No cooking on the stove, just sugar, lemon juice, pectin and berries!
Delish!

Wednesday, August 25, 2010

Fresh Garden Salsa

I made this delicious salsa from a recipe I got from my friend Kari.  After sampling hers, I knew it was going to be a big hit!

Here is the full recipe, although I made a 1/2 batch to test it out and learn the ropes.

28-30 tomatoes, peeled and chopped
(I used a mixture of Romas, Big Boys and Celebrity.  Using a mixture will give you better flavor.  If you aren't sure how to peel a tomato, go here.
4 green peppers, chopped
4 onions, chopped
12-15 Anaheim peppers, seeded and chopped
2 jalapenos, seeded and chopped
4 big cloves garlic, minced
1 tsp salt
2 tsp dry mustard
1 can chopped and sliced green chilies
1/2 cup sugar
4 cans tomato paste

I chopped everything in my Cuisinart instead of by hand.  I hate chunky salsa...so if you want a chunkier consistency, I suggest you chop some things if not all by hand.  

Put all together in a large stock pot  and mix together well.  Let stew on low heat for 21/2 hours.  

You will need a canning pot with metal rack and lid as well as canning jars, lids and rims.

While salsa is stewing, make sure jars are washed well.  Place on a cookie sheet in an oven at 225 degrees for at least an hour until you are ready to use them.  Do not let them cool down before filling.

In a separate pan on the stove, boil water and place lids and rims in to sterilize for about 15 minutes.  Take out and dry off.  Set aside. 

Fill canning pot full of water and start to boil.  Once boiling, reduce heat.

Taking one jar out of the oven at a time, fill with salsa leaving about 1/4-1/2 inch head space.  Place lid on and then tighten rim.  Place in wire rack in hot canning water.  Repeat until rack is full.  

Lowering rack full of salsa jars into the canning pot, make sure there is at least 2-3 inches of water covering the top of the jars.  Cover pot with lid and let gently boil - process time is 15-20 minutes.

When done, take jars out and set aside.  Repeat process until all jars have been filled and processed.

Half recipe makes about 7 pint jars of salsa. 
Full recipe makes about 14 - 15.


Friday, July 30, 2010

Dan's Favorite Lemonade Cake

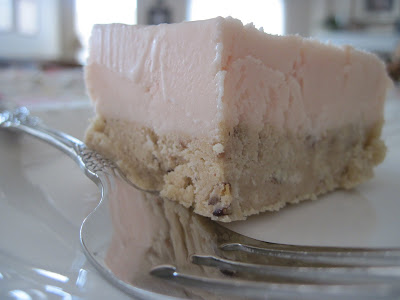
I kid you not...when you take your first bite of this, your taste buds will be very confused.  And then they will be sent straight to heaven.  Especially if you have it on a hot summer night.  The combination of sweet and tart is amazing.  
This is a Olsen family favorite!

Dan's Favorite Lemonade Cake

1 1/2  pkgs Keebler Pecan Sandies
1/2 - 1 stick butter

 Put cookies and softened butter in KitchenAid mixer.  Mix well until cookies are crushed and ingredients are well blended.  You don't want this too buttery OR too dry.

Pat into bottom of 9 x 13 pyrex dish.   Use fingertips to spread evenly and press down gently.

1/2 gallon vanilla ice cream, softened
1 can pink lemonade concentrate

Mix together in a KitchenAid Mixer or large bowl by hand.  Pour over top of cookie crust mixture and spread evenly.  
Freeze to harden, at least one hour.

Set out a few minutes prior to serving so that it's easy to cut.  
Serve and enjoy! 


Linking to:


Thursday, July 22, 2010

Sally's Slaw Salad

 This is a recipe I got from my mother-in-law, Sally.  

This is Sally...isn't she cute?  She is so pretty and sweet.

 Anyhow, she planned a girls day for us a few summers ago and made this for lunch.  
I make it several times every summer.  It's quick, easy, light and yummy!

You will need:
1 package cole slaw
1 package broccoli slaw

 In case you have never seen broccoli slaw, you can see what it looks like next to the cole slaw.  

1 package chicken Top Ramen noodles, uncooked, crumbled well
1 can cooked chicken (or I like using fresh, grilled chicken breasts)
1/2  to 1 cup slivered almonds
1/2-1 cups chow mien noodles

Toss together.  

In a separate bowl, mix together:
1/2 cup rice vinegar
1/2 cup sugar
1 packet Top Ramen seasoning, chicken flavor

Pour over salad and stir till coated.  
Yum!

Linking to:


Thursday, July 15, 2010

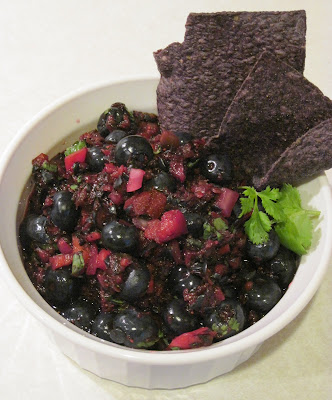
Blueberry Salsa

I found this fabulous recipe for Blueberry Salsa in Southern Living Magazine and gave it a try for book club tonight.  It's so pretty, how could I resist?  You can also never go wrong with their recipes.  They are fool proof!

It's fairly easy to make, even better if you have a killer Cuisinart like Dan gave me this last Christmas.  Otherwise, get to choppin'.


Ingredients
  • 2 cups chopped fresh blueberries (I pulsed it several times in the food processor)
  • 1 cup whole fresh blueberries
  • 1/4 cup fresh lemon juice
  • 3  tablespoons chopped fresh cilantro
  • 2 seeded and minced jalapeño peppers
  • 1/3 cup diced red bell pepper
  • 1/4 cup chopped white onion
  • 1/2 teaspoon course sea salt
Preparation
Aren't these gorgeous? 
Coarsely chop fresh blueberries. Stir together chopped fresh blueberries & whole blueberries.
 Looking not so pretty yet.
Add fresh lemon juice, chopped fresh cilantro, jalapeño peppers, red bell pepper, onion, and salt in a large bowl. 
 Ohhh...looking better!
Gently stir together. Cover and chill until ready to serve.
 I know you're thinking I missed my calling as a food stylist.  Everyone thought it was going to taste sweet and then POW!  
The salsa has a great bite to it.  This is my new go to recipe this summer - delish!

Monday, June 21, 2010

Eclair Cake

I made this Eclair Cake for my dad and Dan for Father's Day.  
It's a fairly simple and inexpensive to make.  
I haven't met a boy (young or old) who doesn't love it!
You will need:

31/2 cups milk
2 small packages french vanilla instant pudding
1 (8 oz) container of cool whip
1 box graham crackers (I use HoneyMaid)
1 can chocolate frosting (not the whipped kind)

Mix milk and pudding until thick.  Add cool whip and mix well.  

Spray 9x13 pan with Pam.  Line bottom of pan with graham crackers.
Pour 1/2 of pudding mixture on top of graham crackers and and spread evenly.  Then layer again adding 2nd layer of crackers. Pour the remainder of pudding on top and spread evenly. Add 3rd and final layer of graham crackers.
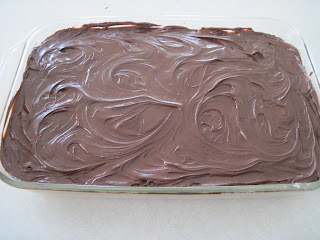
Place in fridge for 2-3 hours to let it all soak together.  Then frost cake with chocolate.  Let sit for at least another hour in fridge after frosting to let it all soak together again. 
Enjoy!

Friday, May 14, 2010

Peanut Butter Cup Rice Krispie Bars

One of the easiest sweet treats to make is a rice krispy treat. The basic recipe has only three ingredients - marshmallows, rice krispies and butter.  
These rice krispies are topped with a layer of peanut butter and a layer of chocolate, giving them a rich peanut butter cup flavor that is a great contrast for the sweet, crunchy base. The peanut butter layer is slightly crumbly, similar to the interior of a peanut butter cup.. The topping is a chocolate ganache, made with semisweet chocolate and butter.
The only time consuming piece of this snack is that you need to let the layers set up one by one. Even so, you can probably get it done start to finish in an hour - and the hands-on time is probably about 5-10 minutes. They’re a great treat to make with kids and are probably just as likely to be a hit with adults.  All the men I had try them gobbled them up!  (ok, Dan and my dad...but you get the idea...)
Peanut Butter Cup Rice Krispie Bars
2 tsp butter
5 oz marshmallows (1/2 large bag)
3 cups Rice Krispies/puffed rice cereal

Peanut Butter Filling
1/2 cup butter, room temperature
3/4 cup crunchy peanut butter (natural or regular)
1 1/2 cups confectioners’ sugar
1 tbsp milk

Chocolate Topping
1/4 cup butter, room temperature
1 cup semisweet/dark chocolate chips

Lightly grease a 9×9-inch pan.
In a large, microwave safe bowl, combine butter and marshmallows. Heat until butter is melted and marshmallows are soft. Stir to combine. Fold in rice cereal with a spatula, then pour mixture into prepared pan and press into an even layer. Allow to cool and set at room temperature.
For the peanut butter layer, combine all filling ingredients in a medium bowl and beat with an electric mixer until smooth. The consistency should be like frosting. If it is too crumbly (consistency may vary slightly by type of peanut butter used), add an additional tablespoon or two of milk until filling is spreadable. Spread onto cereal layer.
For the chocolate topping, melt chocolate chips and butter in a small, microwave-safe bowl. Stir until smooth. Pour over peanut butter layer and, using an offset spatula or regular spatula, spread chocolate to cover entire surface. Let chocolate set up at room temperature before slicing.
 Makes 20 rectangular candy bars.

Tuesday, April 13, 2010

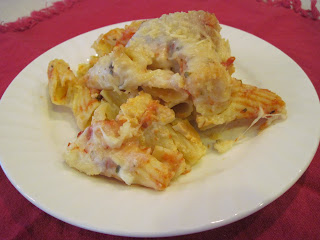
Cheesy Rigatoni Bake

1 (16 ounce) rigatoni noodles
2 Tbsp butter or margarine
1/4 cup flour
1/2 tsp salt
2 cups milk
1/4 cup water
4 eggs, beaten
2 (8 oz) cans tomato sauce (I used a jar of marinara)
2 cups shredded mozzarella cheese
1/4 cup shredded Parmesan cheese

Cook pasta according to package directions.  In a saucepan, melt butter.  Stir in flour and salt until smooth, gradually add milk and water.  Bring to a boil, cook and stir for 2 minutes or until thickened.
Drain pasta and place in a large bowl.  Add beaten eggs to pasta and mix.  Spoon into a greased 9x13 pan.  Top with tomato sauce and mozzarella cheese.  Spoon white sauce over top and sprinkle with Parmesan cheese.  Bake at 375 for 30 to 35 minutes.

To freeze, slightly under cook pasta.  Cover pan with plastic wrap and then aluminum foil and label. 


Tuesday, April 6, 2010

Creamy Ham Casserole

 An easy and quick way to use leftover Easter Ham!


2 cups shredded cheddar cheese
2 cups coarsely chopped ham
2 cups tri color rotini pasta, cooked and drained
1/2 cup mayonnaise
1/2 green or red pepper, chopped
1/2 bag frozen peas and carrots
Seasoned bread crumbs

Heat oven to 350 degrees
Mix all ingredients except 1/2 of cheese and crumbs in large bowl
Spoon into casserole dish
Sprinkle with remaining cheese 
Cover with bread crumbs
Bake for 30 minutes or until light brown.

Friday, April 2, 2010

Oreo Cookie Lollipops

OREO COOKIE LOLLIPOPS
I make these now and then for fun treats - they make cute simple gifts.  
I seriously love cute and simple!

So we came up with these, too bad I got instructions on HOW to do them after I started, but it turned out to be pretty easy and they looked CUTE if I say so myself!
First you will need Double Stuff Oreos, white chocolate chips, lollipop sticks, cellophane treat bags, sprinkles, tags and ribbons (if gifting them.) I bought everything in one quick trip to Wal-Mart.
HINT! I did this backwards!! Melt your chocolate in the microwave, stirring every 30 seconds till completely melted. Dab a tip of your lollipop stick into the chocolate before sticking it into the Oreo ever so slowly and gently! The chocolate on the tip acts as a glue to keep the cookie on the stick!
Re-heat your chocolate if necessary for a few seconds. Dip cookie thoroughly in chocolate coating both sides. I used a spoon to help pour extra where the stick meets the cookie. Place to harden on wax or parchment lined cookie sheet. I would do 3-4 cookies, then sprinkle!
To make sure everyone knows I'm a novice baker, here are a few of my rejects before my happy helpers Graham and Greg ate them in the name of "taste testing." Quality assurance working at its best!
Letting the chocolate harden and cool. Took about 30 minutes till I felt I was safe to wrap them.
Ta-DAA!!! I didn't get a shot of the ones we gave L. I had a larger treat bag, stacked 4 (2 sets of 2 side by side) and wrapped multiple ribbons with a tag. 
They really turned out darling!